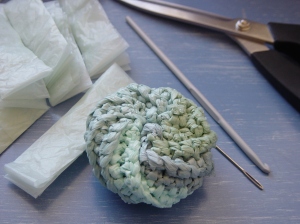
 This spiral scrubbie is green in more ways than one! This pattern by Judith Prindle can be found at Crochet Patterns Only but because I can't read crochet patterns well, I watched a utube video by Donna from Naztazia. Donna was excruciatingly painful for me to listen to, but at least I worked out the pattern thanks to her. The materials needed are 4 plastic shopping bags (I used green coloured ones), a pair of scissors, a very large sewing needle and a mid-size crochet hook.
I don't know if this dish scrubber was worth the effort to be honest, because now I have sore wrists and a blister from working with the thick plastic all afternoon. Dish scrubbers usually only cost a dollar or two from the supermarket. One good thing though is, by making my own dish scrubber from recycled material, I'm doing my bit to disrupt the imbalance in our consumer society. Believe it or not, we actually don't Have to buy absolutely everything from the capitalists! Another good thing is the simple satisfaction of making something myself that is actually of practical use.
The first step is to make some plarn. I do it the way Rachel Choi taught me from Crochetspot. I only cut up one bag at a time so I don't have too much left over, and it also gave my hands a break from working with the stiff plarn.
[gallery columns="4"]
1. I then made a rhombus shape by adding a stitch at one side and dropping one at the other, this is with single crochet.New rows are added in the back loop to give the ridges.
2. Then you sew up the edges of the rhombus to make a tube. Sewing it in a rhombus shape will give it the ridges for scrubbing and the spiral effect at the end.
3. Then thread the plarn through the large sewing needle. Sew in and out along the top of the tube and pull tight. As its made out of plastic, the plarn had a lot of stretch in it so I had to pull little by little to bring it in. Do the same to the other lip of the tube using the other end of the plarn.
4. Pull one end of plarn through the centre so you can tie both pieces together to finish it off.
Special thanks to these ladies for free patterns and demonstrations
Rachel Choi @ Crochetspot
Judith Prindle @ Crochet Patterns Only
Donna Wolfe @ Naztazia

No comments:
Post a Comment