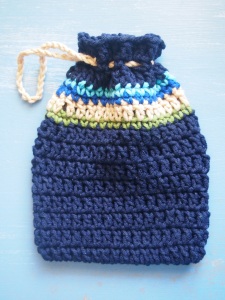
I just made this plastic bag holder up in a couple of hours on Sunday, and when it was finished it was put straight to work!
This took me just over two hours to complete, I used some dark blue acrylic yarn my mother gave me, and a large 5mm hook to make quick work of it. It is 9 inches wide, to start I just made a chain that was 18 inches long and sl st it to form a loop. The next round was a dc (US crochet) into every ch. The 2nd round was 3 ch, (sk 1 dc, 1 dc) repeated to end, sl st in 2nd ch. The 3rd round is sl st into next sp, 3 ch (dc into next sp, 1 ch) repeat to end, sl st into 2nd ch. Repeat 3rd round until the tube is 18 inches high. The last round is 2 ch (dc into next sp, dc into next dc) repeat to end, sl st into 2nd ch. Then finish with a chain that is 18 inches long. Thread this ch in and out of the last round of dc then sl st into 1st ch to form a drawstring, fasten off. Lastly, make another drawstring for the other end by starting an 18 inch ch anywhere at the end, then thread this ch in and out of the 1st round of dc, then sl st into 1st ch to form a loop. Pull the ch to tighten the loop.
Because I live in a townhouse, I need to make another one of these for downstairs! I wonder what colour I should make the next one?
Pages
▼
Tuesday, January 31, 2012
Monday, January 30, 2012
After Hours - Who You Gonna Call?
I just used this after hours medical service for the first time, and I can not believe I didn't know about this sooner!
We were given a magnet at our local G.P. when our son was sick on a Friday, it was for an after hours doctor who does house calls. I never knew such a service existed that we could access! It's amazing how much help you get when you have a child. Luckily we didn't need to use the service then because our son got better, but we just used it for the first time on the weekend. It was Saturday afternoon and I knew I would be in a lot of discomfort by that night and into Sunday if I didn't get a script for some antibiotics. I really didn't want a stranger to come to my house, but I started to feel desperate and decided to give this a try.
When we rang, we had to become members of the 'Family Care Friendly Society' so we would then be bulk billed. This membership was just under $45 for the year, and covers everyone who lives in our house for 12 months. Membership means that every doctor's visit for the next year will be bulk billed, which I think is a fabulous deal. I gratefully agreed to pay, as I was expecting the call out fee to be well over one hundred dollars just for the one visit! So these doctors are not in it for the money, and are working to keep people out of crowded and busy hospital emergency rooms. We were told the doctor would come within 3 hours, but they came after an hour and a half. When the doctor came, she was lovely of course and the job was done in a very timely manner.
What a great service. I just wish I knew about it earlier, and that I didn't have to suffer through many nights, weekends and days in discomfort waiting for an appointment to see a daytime G.P.
free magnet from my G.P. |
When we rang, we had to become members of the 'Family Care Friendly Society' so we would then be bulk billed. This membership was just under $45 for the year, and covers everyone who lives in our house for 12 months. Membership means that every doctor's visit for the next year will be bulk billed, which I think is a fabulous deal. I gratefully agreed to pay, as I was expecting the call out fee to be well over one hundred dollars just for the one visit! So these doctors are not in it for the money, and are working to keep people out of crowded and busy hospital emergency rooms. We were told the doctor would come within 3 hours, but they came after an hour and a half. When the doctor came, she was lovely of course and the job was done in a very timely manner.
What a great service. I just wish I knew about it earlier, and that I didn't have to suffer through many nights, weekends and days in discomfort waiting for an appointment to see a daytime G.P.
Sunday, January 29, 2012
A New Home for my Blog
My husband has been helping me decide where to put my blog, we're thinking it might be best to put it on Google as that is where his blog is!
It certainly seems like a lot of work to move a blog around, it would be best if I found a spot and stayed there!
As a test, here is a photo pf Thomas's very first certificate, which I've been meaning to post! It was for Sing & Grow last year, when we went to some sessions with a music therapist, It was great and we even have this cool certificate to show for it! How good is that?
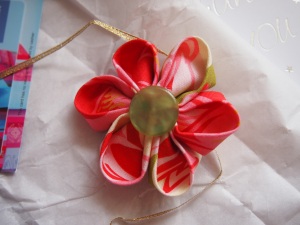
Ronda's homemade flower brooch
This just arrived in the mail, a special handmade gift from Ronda, an old friend of my mother's!
Ronda saw a photo of the first tea cosy I ever made on facebook and asked me to make her one, so I made her one and posted it to her. My second go at a tea cosy was a bit fancier, it was a reversible two way tea cosy with a Lady Grey side, and a Ladybird side. Ronda liked it so much she sent me a present back, which included her home made flower brooch!
How sweet, now I just have to find a special place to put it. I'm thinking my favourite sun hat could do with an embellishment like this!
Saturday, January 28, 2012
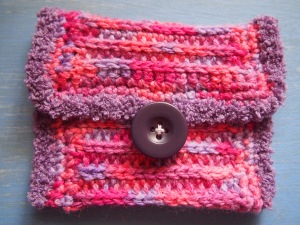
Small camel stitch purse with a fluffy edge
I just finished this small purse today, completing the purple fluffy edge. I had made this to give to a friend as a gift, but I've decided to make her something else instead! I don't know who I'll give this one to.
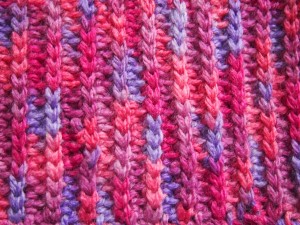
The other week while on youtube, I stumbled upon some videos of a stitch I didn't know. It was called the 'camel stitch'. It was interesting because it's supposed to resemble knitting, so I decided to give it a try. I made a rectangle that measures 18cm x 8cm of the camel stitch. Then I went around it with a border of 2 rounds of sc. I used the last of my berry pink yarn from Lincraft, and a 4mm hook. Then I folded it to make the purse and stitched the sides and the lip in sc, leaving a 5 ch loop for the button, using the fluffy purple yarn. I ended by stitching a large purple button on the front. Hey presto! A small purse!
The finished product measures 11cm x 9cm, I wonder if anyone would like it.
Wednesday, January 25, 2012
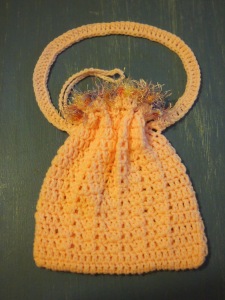
A little pink bag with a fluffy top
I made this little bag today (last Saturday), I'm thinking this might be a gift for a one year old girl and inside I will hide a small toy or book!
Like almost all of my little bags, I started this one with a row of dc, then 2 extra dc in the end then continue around the other side of the ch dc in the bottom of ea dc, then 2 more dc in the other end, sl st to make a round. The second row is another round of dc. Then I put a part section of the same shell stitch as in the caps I made in this same soft silky acrylic yarn. I did that for 10 rounds, then 2 more rounds of just dc. I then do a round of 2 ch, (sk 1, sc, 1 ch) repeated to end, sl st in 2nd ch. Then the lip is finished with 2 rounds of dc. I then made a long ch to form the drawstring, which is threaded through the 1 ch, 1 sc round. Lastly I added a ch handle, then a second row of dc into that handle. I embellished with some fun fluffy yarn at the lip to add some extra colour and texture.
For this bag I used a 3mm hook to make it more firmer than the hats, when I used a 4mm hook so they come out light and airy. I hope this will make a nice little gift!
Tuesday, January 24, 2012
Variegated Slanted Shell Cap
variegated slanted shell cap for a 9yo girl |
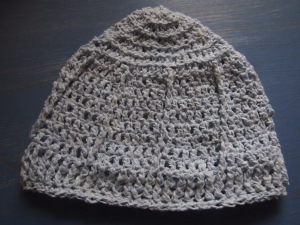
For this cap, I used a beautiful variegated yarn from the Wangaratta Mill, which is in Australia. If I had a choice, I would only use locally produced yarn, but of course its amongst the most expensive. Luckily I found this yarn on special! It has flecks of green, purple, pink and blue in it, which is very nice! My guess is this is acrylic, not wool due to the price I got it at, but I might be mistaken as the label did not say.
For this cap I used the 4mm hook and started with 7 rounds of increasing dc. I then tried a new stitch I saw for the first time the other day on youtube called a slanted shell stitch. I had to have a think about how I would do it in a round though. I turned the cap around and went back the other way, starting with 3 sl st before starting the slanted shell pattern. There are 10 rounds of slanted shell in this cap. Finally, I edged it with 5 dc scallops, with a sc in the 3rd dc. This is 24cm along the rim (so 48cm circumference), and its 19cm high.
This cap might be too warm to wear on a hot summer's day, but hopefully it will make a very pretty autumn cap.
Monday, January 23, 2012
Reversible Blue Cotton Cap with Ridges
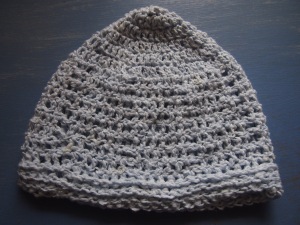
I used some very nice 100% blue cotton for this cap, intended for a 9 year old girl. I hope she likes it!
Because the cotton has a bubble texture, I decided I needed a simple design for this cap. I chose to do ridges which you can see through the thick yarn, anything more delicate and you would have missed it.
I started with a 3.5mm hook, because with thicker yarn than I used for the other caps I made for this recipient, the hat would not be the same size in the end. This one has 6 increasing rows, and one side of that section has horizontal ridges. These ridges are formed by only going through one part of the loop when you normally go through two.
When the rounds stop increasing, I turned the cap over so the back became the front and the ridges on the underside were showing. Then I started making vertical ridges by going under the post. There are 8 rounds like that.
Finally I made all the stitches in the next 2 rounds go behind the posts, making them all sit forward, and the reverse side had ridges. The very last round is a row of sc through one loop only to again create a ridge.
Its a very 'ridgy' kind of cap! Hopefully the cotton will mean it ends up being a nice, cool one too!
Sunday, January 22, 2012
Three chemo caps, medium size
I finished the medium size pink cap on Thursday, after finally working out a size that might fit a 9 year old. I made a small size, and then an adult size, before doing that though!
These caps are intended for a 9 year old girl who has started chemotherapy. How awful for her, I hope she likes at least one of my caps enough to wear and help her through this time (as little comfort as that may well be).
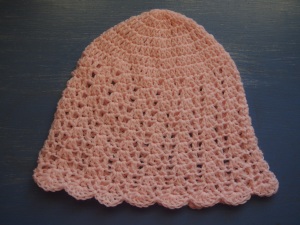
The light and airy, pretty pink cap has 7 increasing rows. Then there is the shell pattern to the end, finished off with a scallop edge. The pattern is 2 ch sk 1, 3 dc, sk 1 (1 dc, sk 1, 3 dc, sk 1) repeated to end, sl st. The scallop edge is 5 dc into every middle of 3 dc, with a sl st into the single dc.
I used a 4mm hook for this one, just like the other two pink caps I made. Without stretching it, the cap measures 23.5cm across the base (so 47cm circumference), the height is 19cm. There are 7 increasing rows, then 11 rows of shell pattern, then one round of scallops.
I hope I get to find out if any of these fit!
Saturday, January 21, 2012
Matching Pair of Pink Mother Daughter Caps
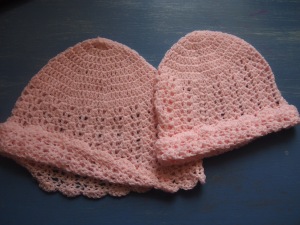
So after I made the light and airy pretty pink cap for a small child, I had a go at making another one except larger. But I ended up making it too large, so now I have a matching pair of pretty pink mother daughter caps.
This large cap has 9 increasing rows, 11 rows of shell pattern and one round of scallops at the edge. It's a bit on the large side, it probably should have 8 increasing rows, not 9. I used the same silky soft pink yarn for both caps, and the 4mm hook, and the same pretty shell pattern I like, inspired by the doll's dress my grandmother made. The shell pattern is 2 ch sk 1, 3 dc, sk 1 (1 dc, sk 1, 3 dc, sk 1) repeated to end, sl st. I finished the adult size pink cap on Thursday.
I'm not sure who might like this mother daughter pair, but I have some ideas!
Friday, January 20, 2012
My Ten Essential Baby Items
We're not planning on having another child, but if we change our minds, these are the things I'll need to remember to buy next time. It won't be before two more years because I don't want two in nappies at the same time, so I'm selling my baby things now because I don't have room to store things we probably won't need. If we change our minds I'll just buy the few essential things we need. At least now we know what to buy, and what not to buy!
There are lots of pages on the net that list the 'essential baby items' you need as new parents. On all the ones I saw they always listed many more items than you actually need, it's almost as if these sites are sponsored by these products and just want you to buy extra stuff! Having a baby is worse than a wedding in this way, they see you coming and try and sell you all sorts of junk you do not need. I want to list here the things we think we do need, just in case we change our minds about another baby.
1. convertible car seat
This of course is a no brainer, they say they won't let you leave the hospital without one in your car. Although no one checked our car when we left the hospital with our son! The question is, do you get a convertible or one with a detachable baby carrier? We got a convertible so it will last us for 4 years, these things are pretty expensive! The detachable baby carrier would be really nice but you can only use it for about 6 months so its very expensive, although you can hire them for a lot cheaper.
2. bassinet on wheels
I just loved my love n care bassinet (sorry for the free advertising there). I got white so it's nice for both a baby boy or girl. It had wheels so I could move it easily around the house as I needed, you can also detach the bassinet from the stand which I rarely did as I didn't want to wake the sleeping baby while I did it. You only use this for a few months though, until they can sit up or roll over. Our son was premmie, so we got to use ours for a few extra months than usual. It makes it so much easier to put your baby down and pick him up, if he is in a little bassinet. If I have to buy another one, I'll just get it second hand from ebay.
3. convertible cot
Again we got white, which is good for a boy or girl, we got the 3 way kind which can not only be used as a toddler bed, but also as a little sofa. We will get years use out of this cot even if we only have the one child.
4. high chair with wheels
You don't need a high chair until they are 6 months old, but I must remember the next one we buy has to have wheels! If we have to buy another one, it will be a good one as you use this for quite a while. I'm always moving Thomas around in his high chair, but the one we have now is a cheap plastic one from Big W without wheels, so I have to lift it to move him around. Also this one is not easy to clean even though it said it would be, but I think all high chairs are probably hard to clean. A baby eating is a very messy affair!
5. reversible, light weight pram
I had a romantic vision of carrying my baby around in a sling all the time, so we bought 3 slings. We weren't sure we even needed a pram and waited until after he arrived to see. But our son was premmie and too tiny for the slings as it turned out. I still remember the relief I felt the day we finally bought a pram and were able to go shopping without carrying him around. We got a wonderful reversible pram where you can choose to have your baby rear facing or front facing. We had him rear facing for most of the first 12 months, it was so nice to be able to see him sleeping happily in it while we had some time out at the shops. I practised folding it up and putting it up many, many times in the shop before we left so I was sure I could do it. It's not too big to be too clumsy, just big enough to do the job. The only difference I would make would be to have more room underneath for my bags, and a drink holder in the handle.
6. a wooden rocking chair
I was lucky enough to borrow an old fashioned, wooden rocking chair from a neighbour. This turned out to be a god send as it was the only thing that would help my baby to sleep for many months. Surprisingly, I found you don't need one with padding, so you can rule out the expensive upholstered breastfeeding chairs with stools. I was rarely in the chair for very long, as my baby nodded off so quickly, it worked so well. An old, second hand one would work just fine.
7. baby bag or similar
I resisted buying one of these for a lot longer than I should have, using a simple bag crammed full of the stuff you need to carry around with you when you have a baby. I thought they were unnecessary. Reality taught me that this is a very handy thing to have, and I love the cheap one I picked up from K-Mart. It has a little change mat that folds out, but I have only used that once or twice. It has compartments that make finding things easier, so a similar bag would be fine, just a one compartment bag was not good enough. Also, it has a good handle with extra padding which is important because it can get heavy and sometimes you are carrying it, but thankfully not too often.
8. portacot and portable highchair
Thankfully these things have been borrowed, and were useful when we had to do the obligatory visiting rounds of the extended family at Christmas. The portacot is also now getting used in the office as an extra playpen. I can pop him in there if I don't want him crawling around in the pc wires.
9. pull apart play pen
This has also been borrowed, and is useful pulled apart and set up in different places in the loungeroom to keep Mr Crawler away from the TV. Also, we use it to close off the loungeroom area when I don't want him in the kitchen.
10. safety gates
We are just using these now as my son is big enough to crawl around and explore the whole house. These are especially important because we live in a townhouse with stairs, so we have them set up to stop him from escaping up them without us being right there.
And I'll tell you what you don't need, you don't need a change table, nor expensive matching furniture. I just use a $20 plastic change mat on top of what will become Tom's study desk. We're keeping one sling for when we go to the markets which is a place you do not want to take a pram, despite some people insisting on it. The other two slings I'm trying to sell as we've never used them. You don't need fancy baby shelves or baby drawers and you certainly don't need to paint your nursery! How ridiculous is that, painting a room especially for a baby. Paint your walls off-white once a decade or two, save your time and money, and it goes with everything! I bought some small and cheap $2 baskets to keep his clothes in, which I can move around to his change table, laundry and some old shelves I have in his room. I also keep some toys in these baskets as I got half a dozen and they've been really handy.
A bouncinette was handy, but only usable for a few short months. When he flipped it over it was time to put it away. And when they can't crawl you can just put them on the floor. I don't think we really needed the play mats either, certainly not two, you can just use any rug or pillow. Although the a-frame was used for several months before he could crawl so maybe another one of those would be good. We were given so many clothes, it was unbelievable, we didn't buy any clothes for months and months, and when we finally did we didn't really need to, we just wanted to. And the same was for toys. Whenever possible I choose unisex colours, so the clothes and toys can be recycled for any baby. I think that's much better for the environment, it increases the chance of things getting used by another baby. Maybe it will be ours!
white bassinet on wheels |
1. convertible car seat
This of course is a no brainer, they say they won't let you leave the hospital without one in your car. Although no one checked our car when we left the hospital with our son! The question is, do you get a convertible or one with a detachable baby carrier? We got a convertible so it will last us for 4 years, these things are pretty expensive! The detachable baby carrier would be really nice but you can only use it for about 6 months so its very expensive, although you can hire them for a lot cheaper.
2. bassinet on wheels
I just loved my love n care bassinet (sorry for the free advertising there). I got white so it's nice for both a baby boy or girl. It had wheels so I could move it easily around the house as I needed, you can also detach the bassinet from the stand which I rarely did as I didn't want to wake the sleeping baby while I did it. You only use this for a few months though, until they can sit up or roll over. Our son was premmie, so we got to use ours for a few extra months than usual. It makes it so much easier to put your baby down and pick him up, if he is in a little bassinet. If I have to buy another one, I'll just get it second hand from ebay.
3. convertible cot
Again we got white, which is good for a boy or girl, we got the 3 way kind which can not only be used as a toddler bed, but also as a little sofa. We will get years use out of this cot even if we only have the one child.
4. high chair with wheels
You don't need a high chair until they are 6 months old, but I must remember the next one we buy has to have wheels! If we have to buy another one, it will be a good one as you use this for quite a while. I'm always moving Thomas around in his high chair, but the one we have now is a cheap plastic one from Big W without wheels, so I have to lift it to move him around. Also this one is not easy to clean even though it said it would be, but I think all high chairs are probably hard to clean. A baby eating is a very messy affair!
5. reversible, light weight pram
I had a romantic vision of carrying my baby around in a sling all the time, so we bought 3 slings. We weren't sure we even needed a pram and waited until after he arrived to see. But our son was premmie and too tiny for the slings as it turned out. I still remember the relief I felt the day we finally bought a pram and were able to go shopping without carrying him around. We got a wonderful reversible pram where you can choose to have your baby rear facing or front facing. We had him rear facing for most of the first 12 months, it was so nice to be able to see him sleeping happily in it while we had some time out at the shops. I practised folding it up and putting it up many, many times in the shop before we left so I was sure I could do it. It's not too big to be too clumsy, just big enough to do the job. The only difference I would make would be to have more room underneath for my bags, and a drink holder in the handle.
6. a wooden rocking chair
I was lucky enough to borrow an old fashioned, wooden rocking chair from a neighbour. This turned out to be a god send as it was the only thing that would help my baby to sleep for many months. Surprisingly, I found you don't need one with padding, so you can rule out the expensive upholstered breastfeeding chairs with stools. I was rarely in the chair for very long, as my baby nodded off so quickly, it worked so well. An old, second hand one would work just fine.
7. baby bag or similar
I resisted buying one of these for a lot longer than I should have, using a simple bag crammed full of the stuff you need to carry around with you when you have a baby. I thought they were unnecessary. Reality taught me that this is a very handy thing to have, and I love the cheap one I picked up from K-Mart. It has a little change mat that folds out, but I have only used that once or twice. It has compartments that make finding things easier, so a similar bag would be fine, just a one compartment bag was not good enough. Also, it has a good handle with extra padding which is important because it can get heavy and sometimes you are carrying it, but thankfully not too often.
8. portacot and portable highchair
Thankfully these things have been borrowed, and were useful when we had to do the obligatory visiting rounds of the extended family at Christmas. The portacot is also now getting used in the office as an extra playpen. I can pop him in there if I don't want him crawling around in the pc wires.
9. pull apart play pen
This has also been borrowed, and is useful pulled apart and set up in different places in the loungeroom to keep Mr Crawler away from the TV. Also, we use it to close off the loungeroom area when I don't want him in the kitchen.
10. safety gates
We are just using these now as my son is big enough to crawl around and explore the whole house. These are especially important because we live in a townhouse with stairs, so we have them set up to stop him from escaping up them without us being right there.
And I'll tell you what you don't need, you don't need a change table, nor expensive matching furniture. I just use a $20 plastic change mat on top of what will become Tom's study desk. We're keeping one sling for when we go to the markets which is a place you do not want to take a pram, despite some people insisting on it. The other two slings I'm trying to sell as we've never used them. You don't need fancy baby shelves or baby drawers and you certainly don't need to paint your nursery! How ridiculous is that, painting a room especially for a baby. Paint your walls off-white once a decade or two, save your time and money, and it goes with everything! I bought some small and cheap $2 baskets to keep his clothes in, which I can move around to his change table, laundry and some old shelves I have in his room. I also keep some toys in these baskets as I got half a dozen and they've been really handy.
A bouncinette was handy, but only usable for a few short months. When he flipped it over it was time to put it away. And when they can't crawl you can just put them on the floor. I don't think we really needed the play mats either, certainly not two, you can just use any rug or pillow. Although the a-frame was used for several months before he could crawl so maybe another one of those would be good. We were given so many clothes, it was unbelievable, we didn't buy any clothes for months and months, and when we finally did we didn't really need to, we just wanted to. And the same was for toys. Whenever possible I choose unisex colours, so the clothes and toys can be recycled for any baby. I think that's much better for the environment, it increases the chance of things getting used by another baby. Maybe it will be ours!
Thursday, January 19, 2012
The Wooden Blocks Pa Murphy made
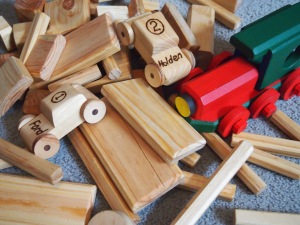
Here are some simply delightful wooden blocks, and a special red and green wooden train made by Pa Murphy as a gift for Thomas!
Isn't this collection of wooden toys just lovely? Its so much nicer than the mass produced blocks you buy from the store. All the more special are these toys because they were made for Thomas by his grandfather. These are something you would want to keep and treasure, and hopefully pass on one day, because no one has anything quite the same as these wooden toys. I'm not sure where the wood came from originally, but I think these are at least some what environmentally friendly because they were made from scraps of wood from Pa Murphy's workshop. For something like this you really shouldn't buy any wood especially, as any tiny bits of left over scrap wood of any shape will do. These were lightly coated with vegetable oil so a very nice, environmentally friendly toy for Thomas!
Another reason why I like these toys is because they are a classic and timeless toy that doesn't have the branding you see everywhere nowadays. As much as possible, I'd like to help Thomas learn the true value of things, and not according to if they have some recognisable logo or image on them, as hard as I know that is going to be!
Definitely an addition to my collection of hand crafted family heirlooms! Thankyou Pa Murphy <3
the wooden blocks Pa Murphy made |
two small wooden toy cars by Pa Murphy |
Definitely an addition to my collection of hand crafted family heirlooms! Thankyou Pa Murphy <3
Wednesday, January 18, 2012
The Silver Candle-stick Holders my father made
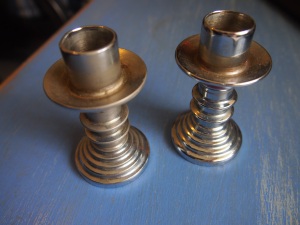
This pair of candle-stick holders are so very special, they were made by my father around the time my parents were married in 1969.
My father was a jeweller's apprentice so knew how to make these from brass and then coat them in chrome. One looks a little tarnished now, and I'm not sure how I can clean them and polish them up. Dad suggested I could get them re-chromed, which sounds very complicated to me! I'd rather they stay the way he made them.
These have been passed around between our family members for a while, and now have come back to me for safe keeping. I intend on keeping a small collection of precious items that have been hand crafted by family members. These items are family heirlooms as far as I'm concerned and I will be teaching my son to treasure them. It's much more precious to have things hand made by your ancestors than other things that have been simply bought mass produced. I hope the collection will demonstrate to my son that its possible to make these things ourselves, that one day he can also choose to make things. So far we have a wide selection of handicrafts in the collection, including carpentry, embroidery, jewellery and of course heaps of crochet. These things are made by family members as far back as my great-grandparents! I also hope the collection will be compact. When passing heirlooms along I do think it's important that the items are not too cumbersome to keep, that they don't become a burden and don't take up too much room.
Check out other items in my collection of family heirlooms if you're interested! There is more to come ...
Tuesday, January 17, 2012
Pink Butterfly
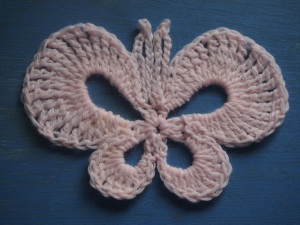
I was thinking to crochet a butterfly to go with the small pink cap, so tried this one. It's not quite right for the hat though so I will have to think of somewhere else for this butterfly.
I googled images of crochet butterflies and found one I liked. I followed the chart, except the largest stitch I used was a triple treble. That's when you yo (yarn over hook) 4 times. There is a larger stitch in the chart which looks like yo 5 x, after some research I couldn't find the name for that stitch. I decided I would just do triple trebles instead. The result is the two top wings look quite large, I don't think the photo on that site matches the chart. Maybe I will try a variation of this butterfly again with thicker yarn so it is a bit firmer, and with some of the stitches smaller than in the chart.There was another butterfly I liked I might also try one day.
This butterfly is too floppy for a brooch, maybe I can stitch it onto a bag or something one day?
Monday, January 16, 2012
Light and Airy Pretty Pink Cap for a small child
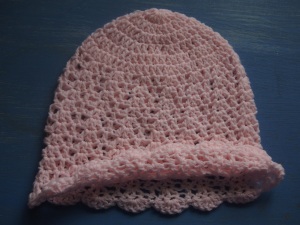
This cap was originally intended for a 9 year old, but its turned out too small for her. This one will fit a 1 to 3 year old, so I will make another one that is larger.
My friend knows a 9 year old girl who is loosing her hair due to chemotherapy. Just imagine being 9 and having to go through that. I'm hoping to make her a nice cap, I chose this yarn because it's nice and soft with a silky feel. She would need an especially soft yarn, and because its still summer and quite hot, I don't want to make anything too warm. I'm not sure what the blend is but my guess is that it's acrylic. I started this on Thursday afternoon and finished it on Friday, using a 4mm hook.
There are 6 increasing rows, then the non-increasing rounds have a pretty lacey pattern. The pattern is 2 ch sk 1, 3 dc, sk 1 (1 dc, sk 1, 3 dc, sk 1) repeated to end, sl st. I thought it would be big enough but I had nearly finished when I realised it would only fit a small child, not a 9 year old, after checking a site that lists head sizes for crochet hats.
But I finished the hat anyway, because I know some 1 year old girls. Maybe one of them would like it?
Sunday, January 15, 2012
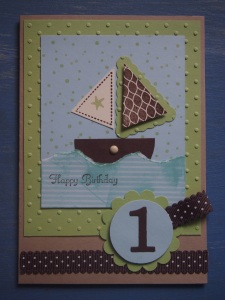
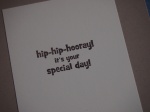
Handmade Green and Blue 1st Birthday Card
This is another simply gorgeous card made by my mother. This one is for Aiden, who turned one on Friday.
On Saturday afternoon we went to Aiden's grandparent's house for a party, it was lots of fun with lots of people there. I'm so happy to be able to give these special birthday cards, it's so much nicer than store bought cards I think.What do you think?
Saturday, January 14, 2012
Two Way Tea Cosy, Ladybird and Lady Grey
You'd think that deciding to decorate a red tea cosy to make it look like a ladybird wouldn't be too hard, right? Well, it turned out to be a lot more difficult than making this reversible tea cosy in the first place!
The idea for this tea cosy is based on the first one I did in a sunshiney yellow. But that was only one layer, this one has two layers for added warmth. Because it has two layers, why not make it reversible, right? I wasn't sure I would be able to do it, but it turned out to be fairly straight forward. I know the recipient requested neutral tones, which is why the first layer is a tasteful grey, but it's for a red tea pot, so I couldn't resist some fun! And I had a good roll of nice red yarn to do it with. I started off with 4 squares, 2 in grey and 2 in red. This time the ridges are vertical, not horizontal like in my yellow tea cosy, so there is more stretch. I don't have the intended tea pot here to test the size, so hopefully it will fit with the extra stretch. For the body I used a 4mm hook, and medium weight yarn. I ran out of the thick black, so had to start using a finer black wool for the edging, as that was all I had. Because at least some of the black is pure wool, as well as the grey which looks like it might be a sock wool, this tea cosy will need to be washed as if it was wool, just in case there is some shrinkage. Another idea I have for a tea cosy, is making one side green and decorating it like a garden with butterflies and flowers.
Joining up the squares and neatening off the edges proved to be fairly straight forward. Making the final decision on how to make the red side resemble a ladybird was trickier. Do you think it looks like a ladybird? I hope the recipient does, and gets a nice surprise when she turns the grey tea cosy inside out!
Reversible Tea Cosy - Lady Bird |
Lady Grey side of reversible tea cosy |
Friday, January 13, 2012
Toy Marble Bag
I made this on Wednesday when Thomas was having his nap. I have to work quickly if I'm to get anything done, it's impossible to crochet when he is awake because all he wants to do is grab it off me!
This is really simple to make, very similar to the bag I made last week but this time because it has less stripes I used some dc (UK tr crochet) and forwent the longer handle. It just has a simple draw string handle at the lip. To keep it simple, I used 5 colours from my collection of thick cotton blend, black, tan, green, blue and light blue. It's just the right size to put a small toy inside!
I hope the recipient doesn't mind it, his first birthday party is on Saturday!
Thursday, January 12, 2012
My New Year's Resolutions
Last year, I didn't have any resolutions, other than to survive my first year as a mum! The previous year my goal was to learn more about crochet, to try and learn how to read patterns. Well I did that, and my baby son is doing very well now too, so now its time to think of a new goal for the new year!
My goal for 2012 is to use up as much of the yarn that has accumulated around here as possible! I hope to make lots of useful items for friends and family, and perhaps try and sell some things on ebay. I really must try very hard not to buy any more yarn! I'm sure I have a lifetime's supply here already!
My other goal is to sell a lot of other things on ebay, things that we don't need or use and no longer have room to store. Our flat is pretty small and its made to feel smaller than it is with all the clutter. My goal for this year is to stream line my house, ready for a possible house move at the end of next year.
Of course, my other goal for the year is to be a good mum! I want to get Thomas into music lessons, and to take him swimming more. And we need to do some more socialising, too!
I think it's useful to start the new year with a new goal, something that is achievable, and something that you will enjoy doing. A feeling of accomplishment is important as we look back over our past year, especially for people like myself who don't work at a job. Even if you don't achieve everything you set out to, it's good to celebrate the gains you have made, even the smallest ones.
What are your new year's resolutions?
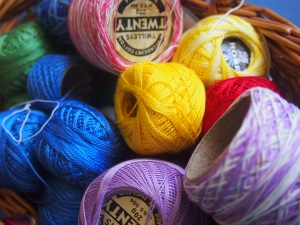
my collection of fine coloured crochet thread |
My other goal is to sell a lot of other things on ebay, things that we don't need or use and no longer have room to store. Our flat is pretty small and its made to feel smaller than it is with all the clutter. My goal for this year is to stream line my house, ready for a possible house move at the end of next year.
Of course, my other goal for the year is to be a good mum! I want to get Thomas into music lessons, and to take him swimming more. And we need to do some more socialising, too!
I think it's useful to start the new year with a new goal, something that is achievable, and something that you will enjoy doing. A feeling of accomplishment is important as we look back over our past year, especially for people like myself who don't work at a job. Even if you don't achieve everything you set out to, it's good to celebrate the gains you have made, even the smallest ones.
What are your new year's resolutions?
Wednesday, January 11, 2012
How to have A Low Stress First Birthday Party
I did a little research before organising my son's first birthday party and I must say I'm really surprised at the level of pressure out there to perform when organising this event, when personally I find that very unnecessary!
Themes? Seriously? You don't need that. For goodness sake, talk about stressing yourself out when you don't need to! I just strung up a couple of balloons with some recycled ribbon! Prettily printed invitations sent in the snail mail? Come on! Just email your friends, easy! Thankyou bags? Maaaybbeeee, if you really want to, but doesn't that make it all a bit too formal? I'd rather have a relaxed affair where the mums and babies can have a good time. Well, I hope my friends had a good time at our party. We just had it at the pool area of my gated commuity, where there was plenty of space. I could have invited more people, several did say they wanted to come. But I was worried about the weather forecast which predicted rain, then we would have to all cram into my small house, which would have been ok, but not as nice. Luckily, it didn't rain. But I do think it's nicer to have smaller gatherings, then I can relax too, and get to chat to everybody. If I had everyone over on the same day, it would have been far too rushed and hectic, and I would have worried about neglecting some of my guests. It was far nicer, for example, to have my brother and family visit on the previous Sunday so we could hang out as a family without a bunch of people they didn't know.
One dilemma I did have was the question of gifts. If you read my blog, you might know I'm not really keen on our tradition of gift giving. But I don't want to be a kill joy either, nor do I want to offend my friends and family. So I did some research on this topic and discovered in some forums, that some people have quite a passionate opinion on this. I would have preferred to have said in the email 'please, don't bring gifts' but in my experience, that never works and some people always bring gifts anyway, no matter what you say. I found some people find it really sad and it takes the fun out of it for them. I also read that it was polite etiquette not to mention gifts at all, that to say 'no gifts please' implies that people should bring gifts, which some people think is rude!
My husband was home from work on holidays, so we decided we would put some nice nibblies on for the grown ups, and I decided not to mention gifts at all. That way, if people wanted to bring gifts, it was up to them if they wanted to, and at least we put on some food as a thankyou. I do think that if people bring gifts, they shouldn't have to bring food as well. It's not that hard to put on a bit of food. My husband baked some pesto and sweet chilli scrolls, marinated chicken wings and rosewater biscuits which were very popular. I made up a fruit platter and some dips with crackers. To further reduce stress, I tried to open gifts as guests arrived. This way there would not be a big parade of gifts everyone has to sit and watch, which I don't like. Unfortunately, I didn't quite manage it as three mums arrived at the same time when we were busy, so we opened their gifts after we did the cake ritual.
The fun thing is, I now have presents to make for 5 more babies as they all turn one soon, because Thomas was the eldest in our mothers group!
Tuesday, January 10, 2012
Easy 1st Birthday Cake
I'd highly recommend a cake like this, not just for a 1st birthday, but for older children as well.
There are two great things about this kind of cake. First is, it's fairly easy to make and decorate. Secondly, there is no cutting of the cake, nor plates and napkins to organise. Guests simply grab a cupcake as they wish!
My husband made the cupcakes using coloured cupcake papers in a muffin tray, and a chocolate cake recipe. Then I iced them using the icing recipe on the pure icing packet. I even got blisters on my thumbs from mixing it, that's a dedicated mum for you! Then I used writing icing in bright colours to decorate the iced cupcakes. I highly recommend that product because it was so easy to write his name, I just needed a steady hand and sat calmly on a stool at the kitchen bench. It was easy to simply put one letter of his name on six cupcakes, making the cake nice and personal.
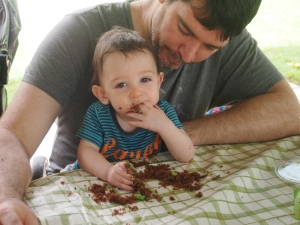
On a whim I decided to decorate a few with pink icing! I decided there was nothing wrong with having pink icing on my son's cake, especially his first birthday cake, as it was us who were celebrating, and as his mum I decided I needed some pink! It has certainly been a hard year that I am glad to put behind us.I've been looking forward all year to seeing Thomas eat a chocolate cupcake on his first birthday. For a couple of months there I was worried he wouldn't be able to do it. Feeding my baby and making sure he ate enough has been my main worry all year, although he's never been technically underweight he's always been a small baby and small eater. I was so happy when he finally devoured his cupcake for all to see, making a very big mess!
Surprisingly, or perhaps not so, the pink cupcakes went first. Most of the guests were mums, and we all like a bit of pink sometimes. They were very, very yummy!!
Monday, January 9, 2012
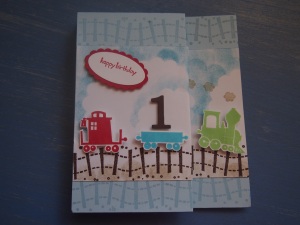
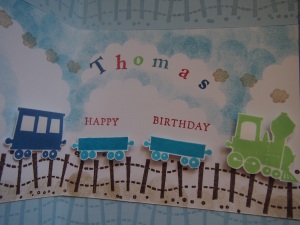
Handmade 1st Birthday Card for Thomas
Thomas turned one nearly a month ago, but we've been so busy catching our breath after a very busy Christmas season, this is the first chance I've had to blog about it!
This was our first 'proper' Christmas with Thomas, as his first Christmas was spent in the hospital nursery, and I was still in hospital that day myself. That's why we decided we should make an extra effort this season, and visit everyone in the family, which we managed to do, except for seeing my sister and her family in Darwin. We hadn't gone anywhere all year, with Thomas being so small I didn't feel confident enough. So Christmas was a very busy season for us indeed this year, and we've decided we should spread things out a bit better next year so it's not so overwhelming!
One thing we can't change though is Thomas' birthday, which is on December 14th, right when things start to get busy. We had to have a party of course, in fact we celebrated all week with visits from family and friends spread out so our small home would not be too crowded in case it rained. Thankfully it didn't rain! My mum came to visit Thomas on the day though, and brought gifts and this very special handmade 1st birthday card.
I just adore my mum's handmade greeting cards, don't you? They are so special. I'm trying to convince her to try and sell some, I think they might be popular!
Sunday, January 8, 2012
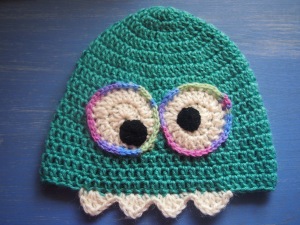
Monster Beanie for a Small Child
I made this monster beanie yesterday, thinking it was going to be a gift for a 1 year old boy next weekend, but it is sooo hot right now, I really think my beanie will be an inappropriate gift! I will just have to make something else that is more summerish! Inspiration for this beanie came from googling images of 'crochet gift for one year old boy' then 'crochet monster hat', none were quite like mine.
Using some more of the sea green I have left from the Wangaratte Mill, I started by making a beanie. I fitted it to my 1 year old son's head, to make sure it would fit, using a 4mm hook. The first 6 rows are increasing, the very first round had 16 dc. The 2nd round increasing every 2nd stitch, so it's 2 dc 1 dc repeated *, which makes 24 stitches in the round. The 3rd round increases 2 dc 1 dc 1 dc, repeated, the 4th round increases 2 dc 1 dc 1 dc 1 dc, repeated, the 5th round increases 2 dc 1 dc 1 dc 1 dc 1 dc. After that, each row just has the same dc as the previous row. To make a beanie for a larger head, you increase the number of increasing rows, to make a smaller beanie you decrease the number of increasing rows. I make rows until the beanie covered my son's ears. You can make it slightly shorter, or longer if you want a turned up edge. I hope that makes sense to you, because it makes sense to me!
To make the beanie look like a monster I decorated it with two eyes and 4 sharp white teeth! The pattern for the teeth is 1 ch, 2 dc 1 ch 2 dc, 1 sc, 1 sl st, (1 sc, 2 dc 1 ch 2 dc, 1 sc, 1 sl st) x 3, for 4 teeth. Pull and pinch the ch at the tips slightly to make the teeth appear pointed. For the eyes, I made 2 flat circles in white. 1st round has 12 dc, the 2nd round has 24 as it increases 2 in every st. Then I made 2 smaller black circles, using finer black wool, I threaded the ends onto a needle to sew the eyes together and onto the beanie at the same time. To finish, I edged the eyes with varigated yarn, also from the Wangaratta Mill, to attach the eyes more securely. I think the multi-coloured edge to the eyes makes the monster more friendly looking, as does the wonky tilt to his eyes!
I'm not sure what will happen to this beanie, I might give it away, or use it as a beanie for my son this coming winter. This was so easy to make, if my friends wanted some I'm sure I could whip up some more. I like making these as the colour choice is pretty open ended, which means I can use up some of this yarn that is piling up here!
* my apologies to my fellow Australians who read UK crochet, as this is in US crochet. To convert into UK crochet sc = dc, dc = tr crochet
Saturday, January 7, 2012
Large Purple Granny Rug
I finally finished this rug yesterday morning, after I first bought this yarn in July 2009! So that's 2 and a half years from start to finish, a very long term project indeed!
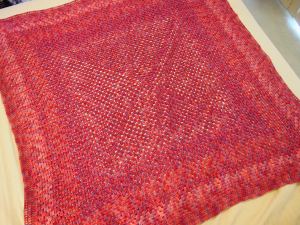
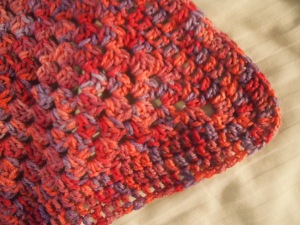
For this I used my 5mm hook, a bigger hook makes the rug go faster and for this one it needed all the help it could get. This is the largest rug I've done and it doesn't even cover my queen sized bed! It's only slightly larger than my other 'therapy rug'. I don't think I'll be doing many of these, they are kinda boring. I just did a bit when watching TV. I find smaller projects that finish quicker much more satisfying. Also, considering there is almost $20 worth of acrylic yarn in this rug I'm thinking it's not really worth it. You can pick up a nice cotton blanket for less and it's larger, you can also get polar fleece blankets for less and I think they're warmer. So, not many more of these rugs from me! The pattern is a simple granny square, with 3 rows of dc at the end. The corner has an extra 7 dc in it.
I'm not sure where this rug is going, maybe on the single guest bed as it's too small for the big bed. I'm just so glad it's finished!
Friday, January 6, 2012
Freiya's Flower Handbag
Today is the second 1st birthday in our mother's group so we have a party to go to, it's very exciting! I made this small striped bag with a flower as a gift, I hope she likes it!
I used 5 colours from my batch of cotton blend, it's a thick yarn so I used my 4mm hook. It's a simple bag, changing colours every row of sc using orange, yellow, green, purple and white. I didn't follow a pattern for the flower either, just did a couple of rounds in yellow ending up with 16 sc, then changed to orange and did 8 petals. Each petals started as 3 ch in every 2nd sc, then the second row is 5 sc into the sp with a sl st to start a new petal.
I used fine cotton and needle to do a simple running stitch to attach the flower to the front. For the bag, a sc ch lip for a ch handle to be threaded through, and a larger ch handle with a second row of sc in orange. The one thing I'm unhappy with is this cotton is too thick to thread through my needle so I couldn't finish off the ends very neatly. Instead I have to weave them in with my crochet hook which means the ends can poke through easily. Eventually there will be some loose ends visible in this bag which will make it look a little rough. Hopefully that will add to the home made character of it!
To go with this gift my mum made a special home made birthday card, which is very nice! I'll also include a small Fisher-Price little people car inside the bag, and of course a book which I always love to give children! Children can never have too many books!
small drawstring bag with flower |
detail of coloured stripes on the handbag |
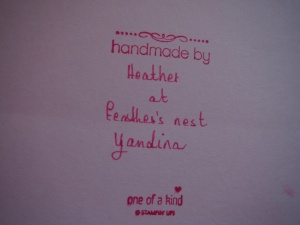
cupcake birthday card made by my mum |
the one of a kind detail on the back of the card |
Sunday, January 1, 2012
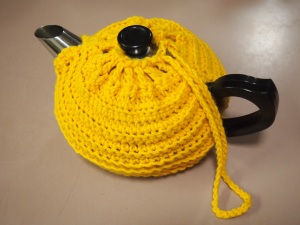
A Christmas Eve Tea Cosy
This is my first attempt at a tea cosy, and considering I didn't have the tea pot with me at the time to fit to measure as I went, it turned out damned well!
It was pretty damn lucky this thing fit, but I did use a stitch that has a lot of stretch in it so it had a chance. I chose some nice soft acrylic my mum had spare and started with two rectangles of alternating rows of ridges. In hind sight, the ridges should have gone vertically instead of horizontally for even more stretch. This would increase the chance of the cosy being used for different tea pots. I chose the cheery and bright yellow colour, not only because it felt soft and would be nice to work with, but because it is a sunshiney happy colour for good luck, perfect for a family kitchen.
I was staring at the two rectangles wondering how to fix it all up as there were several options. In the end I opted to do a quick job with minimal fuss, with 1 dc 1 ch along the top for the ch pull handle. Next time this should only be 1 sc 1 ch to reduce heat loss. If I wanted to do a really good job, I could do two layers and sew them together with a 1 sc 1 dc lip, or maybe that would need the 1 dc 1ch lip, because it will be that much thicker. Also, there should be another row of dc above the lip, to further reduce heat loss. All good to note for the future, in case any one else wants me to make them a tea cosy.
I whipped up this tea cosy on Christmas Eve while everyone else slept and I couldn't. It took me just under two hours, and I used either my 3.5mm or 4mm hook. On Christmas day I did a free form patch on my brother's damaged beanie, I just used some blue that was on hand, it doesn't match very well but I'm sure it doesn't matter as this beanie is bound to end up in the bin. It was very tricky, especially as I've never done it before, but because I am so clever I did an absolutely awesome job!! I can not for the life of me imagine why anyone would think it was ok to take to an especially made custom crochet beanie with a pair of scissors to rig up a tea cosy, but truth is stranger than fiction it seems. Thanks for taking some time to read my blog.